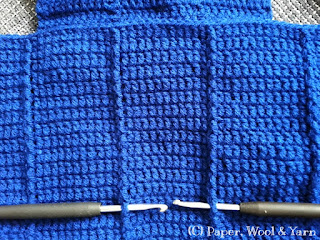
as promised, here's the last part of the Crochet Backpack instructions!
First of all, we need to attach two buttons to the backpack at the 14th row from the top.
To do so, thread the yarn through the holes of the button as shown here:
Then loop through the front post DC shown in the picture below and hook 15 tight CH.
Afterwards, slide the button over the 15 CH and slip stitch around the same front post DC.
Up next, the Front Pocket:
- 17 CH
- 3 CH (first DC), 1 DC into 4th CH from hook, 15 DC, 2 DC into last CH [19]
- 3 CH (first DC), 18 DC [19]
- 3 CH (first DC), 1 DC into same DC, 17 DC, 2 DC into last DC [21]
- 3 CH (first DC), 20 DC [21]
- 3 CH (first DC), 1 DC into same DC, 19 DC, 2 DC into last DC [23]
- 3 CH (first DC), 22 DC [23]
- 3 CH (first DC), 1 DC into same DC, 21 DC, 2 DC into last DC [25]
- 3 CH (first DC), 24 DC [25]
- 3 CH (first DC), 1 DC into same DC, 23 DC, 2 DC into last DC [27]
- 3 CH (first DC), 26 DC [27]
When finished, sew the pocket to the front of the backpack.
The result should look like this:
And last but not least, the Drawstring.
I decided to go for tight CH instead of braiding it. My drawstring measures about 120 cm, about three times the diameter of the backpack, which is about 37 cm.
Now thread the drawstring through the top section of the backpack as shown below. For easier threading, I recommend adding a saftey pin to one end for less fiddling.
 |
| Back of the backpack |
 |
| Front left side of the backpack (think back-to-front for the front right side) |
And that's it, we're DONE :)
And to sum it up, here are the links to all of the different pattern parts so far:
- August 5, 2015 - Starting a new project... => First ideas and draft
- August 12, 2015 - First update on the crochet backpack project => Bottom
- August 19, 2015 - Look what I bought & Update on the Crochet Backpack => Side
- May 18, 2016 - W.I.P.: The Crochet Backpack => Flap
- May 25, 2016 - W.I.P. & we're almost there: The Crochet Backpack => Grap Handle & Shoulder Straps
Happy Hookin' :)
Yours
Uta
![[utas] DIY](https://blogger.googleusercontent.com/img/a/AVvXsEgzfxMnoagGe8U8ZHCTNHjuUJBPm8QhYAEElgT29BwmNZ2V7pEDoTZQ7PvTntEZwIb5fTzbPPPgahOOUUDCl0yk-s27siWtYg5ZevYEpUz9-B0isgeIJwuckkjmGNqy1J-NBANzDL2cBEPZ-u0Bq2uREFzgG4Pbg_dTGGRWsTpScgWf8iA2iU6rqB6cxA=s920)


