Hi all,
a little while ago I sent some happy mail to my friend Sarra who lives in Algeria (check out her YouTube channel).
One piece of that little happy mail bundle was a little book of quotes. And I thought it might be fun to share how I created it.
So first I choose a special paper for the cover, cut it in shape and folded it in half.
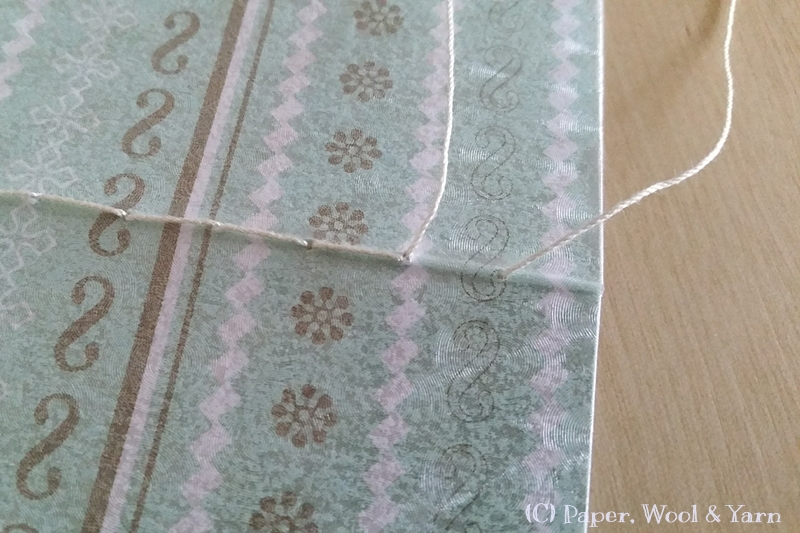
Next I added the pages using paper with different flowery patterns. I then sewed cover and pages together using needle and thread.
Afterwards I logged on to pinterest, went through my quotes board (it's private, sorry), picked out my favourite ones and printed them on sticker paper.
I then cut the quotes out - line by line - and put them on the different pages - DONE!
See, so easy :)
Happy Crafting, everyone!
Yours
Uta
Showing posts with label Tutorial. Show all posts
June 13, 2018
February 14, 2018
DIY Tassels made from Yarn Scraps [Tutorial]
Hello everyone,
as usual I did some crocheting over the Christmas holidays. And while I was fiddling around with plenty of yarn scraps I had the idea to use them for another crafting project instead of just throwing them away. For whatever reason the only thing I could think of was making tassels, something I wanted to try for quite a while now. And here's the result:
Those tassels are quite easy to make...
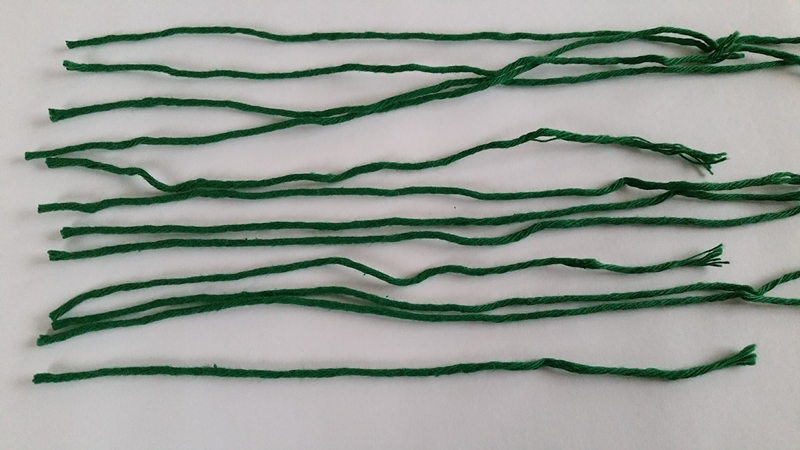
Start by choosing some yarn scraps that are not too short in length.
Bundle them with yet another piece of yarn and tie two knots.
Use some nice looking thread and start wrapping it around the tassel.
When you're happy with the result, close by tying two to three knots. Afterwards use a needle to draw the ends of the thread through the tassel as shown in the picture below.
Cut off the excess thread and shorten the tassel to the desired length - Done!
Now I have to figure out what to do with all those tassels ;)
Happy Craftin'!
Yours
Uta
as usual I did some crocheting over the Christmas holidays. And while I was fiddling around with plenty of yarn scraps I had the idea to use them for another crafting project instead of just throwing them away. For whatever reason the only thing I could think of was making tassels, something I wanted to try for quite a while now. And here's the result:
Those tassels are quite easy to make...
Start by choosing some yarn scraps that are not too short in length.
Bundle them with yet another piece of yarn and tie two knots.
Use some nice looking thread and start wrapping it around the tassel.
When you're happy with the result, close by tying two to three knots. Afterwards use a needle to draw the ends of the thread through the tassel as shown in the picture below.
Cut off the excess thread and shorten the tassel to the desired length - Done!
Now I have to figure out what to do with all those tassels ;)
Happy Craftin'!
Yours
Uta
June 21, 2017
DIY Photo Corners
Hello lovelies,
a little while ago, when working on a small DIY favour for a pen pal I realized I ran out of photo corners but the project I was working on definitely required some. It was a Sunday and as shops are closed on Sundays in good ol' Germany taking the tram downtown and buying some at the local Idee shop was out of question. So I decided to craft some. And truth to be told, photo corners are darn simple to make!
Check out the video below for instructions:
Thanks for stopping by and happy crafting!
Yours
Uta
a little while ago, when working on a small DIY favour for a pen pal I realized I ran out of photo corners but the project I was working on definitely required some. It was a Sunday and as shops are closed on Sundays in good ol' Germany taking the tram downtown and buying some at the local Idee shop was out of question. So I decided to craft some. And truth to be told, photo corners are darn simple to make!
Check out the video below for instructions:
Thanks for stopping by and happy crafting!
Yours
Uta
April 19, 2017
Self-made Moon Journal [Tutorial]
Hello everyone,
lately I've been into making journals myself. Inspired by my first one which I blogged about a couple of weeks ago, I now made another: A Moon Phase Journal!
In case you're interested in making one yourself, check out this video:
Thanks for stopping by & happy crafting!
Yours
Uta
lately I've been into making journals myself. Inspired by my first one which I blogged about a couple of weeks ago, I now made another: A Moon Phase Journal!
In case you're interested in making one yourself, check out this video:
Thanks for stopping by & happy crafting!
Yours
Uta
March 19, 2017
Phenology Wheels for Moon Cycles [Tutorial + Templates]
Hello everyone,
I am totally into phenology wheels lately! I figured they are perfect for tracking all sorts of cycles, especially moon cycles. In the video below I show you how you can create such a wheel yourself.
And this is how the finished result might look like:
Don't feel like drawing your own but still interested in giving phenology wheels a try? No problem, I got you covered!
Feel free to use some of mine - they should fit on an A4-sized sheet of paper just perfectly.
Download them right HERE...
Interested in more downloads? What topics would you like me to cover? Let me know in the comments below!
Yours
Uta
I am totally into phenology wheels lately! I figured they are perfect for tracking all sorts of cycles, especially moon cycles. In the video below I show you how you can create such a wheel yourself.
And this is how the finished result might look like:
Don't feel like drawing your own but still interested in giving phenology wheels a try? No problem, I got you covered!
Feel free to use some of mine - they should fit on an A4-sized sheet of paper just perfectly.
Download them right HERE...
And for those of you wondering why there are no 31-days wheels available - one moon cycle has either 29 or 30 days, never 31.
Interested in more downloads? What topics would you like me to cover? Let me know in the comments below!
Yours
Uta
March 15, 2017
Tissue Paper Butterflies [Tutorial]
Hello everyone,
you might remember the colorful butterflies that were part of my March 2017 planner setup. Here's how to make them :)
In the video I show you how to create those butterflies with just paint. In my March 2017 planner setup I used a silver ballpoint pen instead of golden paint for the contours:
Thanks for stopping by!
Yours
Uta
you might remember the colorful butterflies that were part of my March 2017 planner setup. Here's how to make them :)
In the video I show you how to create those butterflies with just paint. In my March 2017 planner setup I used a silver ballpoint pen instead of golden paint for the contours:
Thanks for stopping by!
Yours
Uta
March 8, 2017
"Frosted" Salt Mason Jar Candle Holder [Tutorial]
Hello everyone,
I got the idea for this project out of a magazine called Landlust which offers quite a lot of rustic DIY ideas.
You basically create a "frosted" candle holder by pouring salt and water into a mason jar. While the water evaporates, salt crystals start to build up on the sides making the glass look frosted.
Let me show you how to get started and how my frosted mason jar evolved:
And this is a picture of the finished candle holder:
Pretty cool, right? :)
Yours
Uta
I got the idea for this project out of a magazine called Landlust which offers quite a lot of rustic DIY ideas.
You basically create a "frosted" candle holder by pouring salt and water into a mason jar. While the water evaporates, salt crystals start to build up on the sides making the glass look frosted.
Let me show you how to get started and how my frosted mason jar evolved:
And this is a picture of the finished candle holder:
Pretty cool, right? :)
Yours
Uta
February 28, 2017
Tea stained Paper [Tutorial]
Hello everyone,
guess who's having her internet connection up and running again :) Finally, after weeks of feeling like being thrown back to the stone age I got my new hardware in the mail today. So here I am, first things first, with some new content for you!
I have quite a lot of great videos to share with you so stay tuned for more to watch over the next few weeks!
And today I am sharing a tea staining technique with you. Enjoy...
This is how the paper turned out. I'm quite happy with the result:
Thanks for stopping by!
Yours
Uta
guess who's having her internet connection up and running again :) Finally, after weeks of feeling like being thrown back to the stone age I got my new hardware in the mail today. So here I am, first things first, with some new content for you!
I have quite a lot of great videos to share with you so stay tuned for more to watch over the next few weeks!
And today I am sharing a tea staining technique with you. Enjoy...
This is how the paper turned out. I'm quite happy with the result:
Thanks for stopping by!
Yours
Uta
January 11, 2017
Simple Booklet [Tutorial]
Hello everyone,
today I want to share with you a simple A5 booklet I made just recently:
I used the following materials to craft it:
I had all these things already lying around so I did not have to by anything for this project.
So here're the instructions:
1. Take some scrapbooking paper in the size of the sheets of paper you intent to use for the pages. This will become the cover. Fold it in half. Also fold the sheets of paper in half.
2. Cut out a piece of d-c-fix foil which should be slightly bigger in size than the cover. Then put the foil onto the cover.
4. Cut the foil around the edges and the spine as shown in the picture below.
5. Then fold the foil over all around. It might be a bit hard to properly fold it, a ruler or bone folder might help.
6. Use a needle or peak to make little holes into the spine of the cover. I used a peak as you can see and I decided to make a tiny hole every cm (2.5 cm are about 1 inch). Afterwards do the same with the sheets of paper.
7. Using thread and a needle, sew along the spine through the cover as well as every sheet of paper. Simply go up and down, up and down,... until the end of the spine....
...then turn around and sew all the way back.
8. Tie a small knot to secure the binding. I also put a small drop of glue onto the knot to make sure it does not unravel.
And that's it!
Let me know what you think about the tutorial! And in case you are actually making some booklets for yourself using it, let me know as well, I'd love to see your results :)
Happy crafting, everyone!
Yours
Uta
today I want to share with you a simple A5 booklet I made just recently:
I used the following materials to craft it:
- Scrapbooking paper for the cover
- D-C-Fix foil for the cover
- 5 sheets of simple printer paper for the pages
- Thread for the binding
- A drop of glue
I had all these things already lying around so I did not have to by anything for this project.
So here're the instructions:
1. Take some scrapbooking paper in the size of the sheets of paper you intent to use for the pages. This will become the cover. Fold it in half. Also fold the sheets of paper in half.
2. Cut out a piece of d-c-fix foil which should be slightly bigger in size than the cover. Then put the foil onto the cover.
4. Cut the foil around the edges and the spine as shown in the picture below.
5. Then fold the foil over all around. It might be a bit hard to properly fold it, a ruler or bone folder might help.
6. Use a needle or peak to make little holes into the spine of the cover. I used a peak as you can see and I decided to make a tiny hole every cm (2.5 cm are about 1 inch). Afterwards do the same with the sheets of paper.
7. Using thread and a needle, sew along the spine through the cover as well as every sheet of paper. Simply go up and down, up and down,... until the end of the spine....
...then turn around and sew all the way back.
8. Tie a small knot to secure the binding. I also put a small drop of glue onto the knot to make sure it does not unravel.
And that's it!
Let me know what you think about the tutorial! And in case you are actually making some booklets for yourself using it, let me know as well, I'd love to see your results :)
Happy crafting, everyone!
Yours
Uta
October 26, 2016
Owls for my Christmas Tree [+ Tutorial]
Hello everyone,
I finally started working on the ornaments for this year's Christmas Tree! Last year I went all Harry Potter and I loved it :) This year, I don't really have a theme. Nevertheless, I want to make a few ornaments myself. And these are the first DIY ornaments - owls!
It all started over at Pinterest where a lot of DIYs actually start. I came across this pin right HERE.
I tried to copy those but truth to be told, the result was a huge fail. But I wasn't willing to give up the whole idea so I did some sort of an interpretation using wooden balls from IKEA instead of fir cones. Et voilĂ , it worked!
Let me give you a quick run-down...
Materials needed:
And you might also need those three shapes. The biggest one should have an overall height of 6cm.
How-To:
Happy crafting, everyone!
Yours
Uta
I finally started working on the ornaments for this year's Christmas Tree! Last year I went all Harry Potter and I loved it :) This year, I don't really have a theme. Nevertheless, I want to make a few ornaments myself. And these are the first DIY ornaments - owls!
It all started over at Pinterest where a lot of DIYs actually start. I came across this pin right HERE.
I tried to copy those but truth to be told, the result was a huge fail. But I wasn't willing to give up the whole idea so I did some sort of an interpretation using wooden balls from IKEA instead of fir cones. Et voilĂ , it worked!
Let me give you a quick run-down...
Materials needed:
- VINTER 2016 decoration balls from IKEA (currently available HERE)
- Thin felt in grey, light blue, white and yellow
- Fabric glue & hot glue
- Brown chenille
- Eyes
- scissors and a pen
And you might also need those three shapes. The biggest one should have an overall height of 6cm.
How-To:
- For each owl, cut out two large wings, two small wings and one shape for the head plus a tiny yellow triangle for the beak.
- Afterwards, glue one small wing on a large wing making two two-layered wings per owl using fabric glue. Mix and match the colors of the felt you are using.
- Glue a little yellow beak plus two eyes on the shape for the head using fabric glue.
- Using plies and a wire cutter, put together two feet per owl using the brown chenille.
- Glue two wings, one head shape and two feet onto one decoration ball using hot glue.
Happy crafting, everyone!
Yours
Uta
April 13, 2016
Joining Granny Squares - just one out of a million methods...
Hey all,
I know I promised to post this one back in March. So little time, so much to do - I unfortunately couldn't find the time earlier to work out a proper tutorial. But finally here we go...
I started with adding an extra full round to one of the two granny squares I'd like to join:
One DC into each DC of the previous round and 2 DC + 2 CH + 2 DC into each corner
Now we basically start adding a quite similar round to the second square as well with which we are joining the squares as we go.
Start by attaching the yarn to one corner of the square, 2 DC into corner, 1 CH, 1 SL around corner of the other square (see below), 1 CH, 2 DC into corner.
Now loop the yarn through the third DC from the corner of the other Square (see below), 1 DC into each of the next 3 DC from the previous round.
Loop the yarn through the third DC from where you looped through before of the other Square (see below), 1 DC into each of the next 3 DC from the previous round.
And again, loop the yarn through the third DC from where you looped through before of the other Square (see below).
2 DC into corner of the square, 1 CH, 1 SL around corner of the other square, 2 DC into the corner of the square.
From there on just continue as descriped before. Et voilĂ , you're done:
As you can see, you will get some kind of zig-zag look when you join squares with two different colors using this method. Should you be using just one color, it will turn out spiral.
Alright everyone, happy hookin' and see you soon!
Yours
Uta
I know I promised to post this one back in March. So little time, so much to do - I unfortunately couldn't find the time earlier to work out a proper tutorial. But finally here we go...
I started with adding an extra full round to one of the two granny squares I'd like to join:
One DC into each DC of the previous round and 2 DC + 2 CH + 2 DC into each corner
Now we basically start adding a quite similar round to the second square as well with which we are joining the squares as we go.
Start by attaching the yarn to one corner of the square, 2 DC into corner, 1 CH, 1 SL around corner of the other square (see below), 1 CH, 2 DC into corner.
Now loop the yarn through the third DC from the corner of the other Square (see below), 1 DC into each of the next 3 DC from the previous round.
Loop the yarn through the third DC from where you looped through before of the other Square (see below), 1 DC into each of the next 3 DC from the previous round.
And again, loop the yarn through the third DC from where you looped through before of the other Square (see below).
2 DC into corner of the square, 1 CH, 1 SL around corner of the other square, 2 DC into the corner of the square.
From there on just continue as descriped before. Et voilĂ , you're done:
As you can see, you will get some kind of zig-zag look when you join squares with two different colors using this method. Should you be using just one color, it will turn out spiral.
Alright everyone, happy hookin' and see you soon!
Yours
Uta
March 30, 2016
Let's draw a Mandala
Hey Everyone,
thanks for stopping by once again :)
Ever since I can remember I've been absolutely in love with mandalas. Coloring them in is one of the most meditative and relaxing activities I can think of. But at a certain point I decided, coloring them in wasn't enough for me anymore, I wanted to draw them myself. This insight came to me a long while ago. Since then I tried different techniques but the results never really satified me.
Then a couple of weeks ago, I started to follow Kara from Boho.Berry on YouTube. I was browsing her YouTube videos and came across this awesome tutorial on how to draw a mandala. Check it out on her blog right HERE...
Of course I had to try that myself. And I must say, I definitely love the results :) Here are three mandalas that I created:
I also documented the process for this one:
So who else loves mandalas :)
Yours
Uta
thanks for stopping by once again :)
Ever since I can remember I've been absolutely in love with mandalas. Coloring them in is one of the most meditative and relaxing activities I can think of. But at a certain point I decided, coloring them in wasn't enough for me anymore, I wanted to draw them myself. This insight came to me a long while ago. Since then I tried different techniques but the results never really satified me.
Then a couple of weeks ago, I started to follow Kara from Boho.Berry on YouTube. I was browsing her YouTube videos and came across this awesome tutorial on how to draw a mandala. Check it out on her blog right HERE...
Of course I had to try that myself. And I must say, I definitely love the results :) Here are three mandalas that I created:
![]() |
| Diameter about 16cm, colored in with IKEA felt pens |
I also documented the process for this one:
![]() |
| I drew this one right into my black Moleskine Journal. Diameter about 16cm, colored in with colored pencils. |
![]() |
| Diameter about 18cm, colored in with water colors. I wanted this one to turn out a bit rainbow-like. |
So who else loves mandalas :)
Yours
Uta
February 3, 2016
Teeny Tiny Paper Envelopes + Tutorial
Hey all,
a couple of days ago I crafted some tiny colorful paper envelopes for an entry in one of my journals. And while cutting, folding and glueing a thought came to my mind: Why not share these tiny envelopes on my blog as well as a quick tutorial on how to make them? So here we are :)
This is what you need:
And now just follow this process - everything you need to know is shown in the following pictures:
Et VoilĂ :
Happy Crafting :)
Yours
Uta
a couple of days ago I crafted some tiny colorful paper envelopes for an entry in one of my journals. And while cutting, folding and glueing a thought came to my mind: Why not share these tiny envelopes on my blog as well as a quick tutorial on how to make them? So here we are :)
This is what you need:
![]() |
| Glue, eraser, sharp pencil, sissors, triangle, paper |
And now just follow this process - everything you need to know is shown in the following pictures:
Et VoilĂ :
Happy Crafting :)
Yours
Uta
July 22, 2015
How To CrissCross Crochet
Hey all,
I really enjoyed this (new?!) crochet technique called crisscross crochet but unfortunately couldn't find any proper instructions online that I could share with you. So I thought I should come up with some of my own. VoilĂ :)
Let's start with the basic crisscross stitch which is nothing more than two single crochet combined. Please note that crisscross crochet only works if you work in rounds. It's a bit like amigurumi I would say.
And here's how to change from one round to another. First you pull the yarn through the last stitch of the current round, then you pull the yarn through the very first stitch of the current round, add one ch and then go on in the new round you just started with the basic stitch I showed you above.
Happy Hookin' everyone :)
Yours
Uta
REMINDER: Our Mystery CAL begins next Monday :)
I really enjoyed this (new?!) crochet technique called crisscross crochet but unfortunately couldn't find any proper instructions online that I could share with you. So I thought I should come up with some of my own. VoilĂ :)
Let's start with the basic crisscross stitch which is nothing more than two single crochet combined. Please note that crisscross crochet only works if you work in rounds. It's a bit like amigurumi I would say.
![]() |
| Click on image to enlarge |
And here's how to change from one round to another. First you pull the yarn through the last stitch of the current round, then you pull the yarn through the very first stitch of the current round, add one ch and then go on in the new round you just started with the basic stitch I showed you above.
![]() |
| Click on image to enlarge |
Happy Hookin' everyone :)
Yours
Uta
REMINDER: Our Mystery CAL begins next Monday :)
Subscribe to:
Posts (Atom)